Blanket Stitch // Hand Embroidery Stitches
Stitches

Blanket Stitch // Hand Embroidery Stitches

A red row of blanket stitches.️

Details

Name:

Blanket Stitch aka: Blanket Edge, Open Buttonhole Stitch

Difficulty:

Easy

Structure:

Buttonhole Looped

Technique:

basic blackwork surface

Uses:

Border Construction Edging Outline


Watch this video on YouTube.


Overview

The Blanket Stitch embodies simplicity, ease, and beauty. Traditionally employed to finish blanket edges, it not only enhances their appearance but also ensures their durability. Widely adopted in diverse crafting projects, it stands as one of the most coveted stitches.

Commonly mistaken for the Buttonhole Stitch, it's more accurate to acknowledge that the Blanket Stitch and Buttonhole Stitch are often conflated. However, a closer examination reveals their distinctiveness. While both stitches serve to secure edges, the Buttonhole Stitch boasts greater strength. Historically, tailors would meticulously hand-sew the Buttonhole Stitch along buttonhole edges for added durability.

Step 01
Come up on the outside edge of the shape and take the needle down on the inside of the shape, a little further in the direction of travel.
Step 02
Assuming you are working left to right, hold the surface thread in a loop to the right, then bring the needle up directly below, on the outside edge, ensuring the needle is inside the loop.
Step 03
Hold the needle in the fabric securely with your surface hand while you pull the thread from the underside to tighten the slack against the loop.
Step 04
Pull the needle through and bring the thread up to the surface.
Step 05
For the next stitch, take the needle down through the fabric on the inside edge of the shape, leaving a gap to the right of the first stitch. Again, leave a loop to the right and bring the needle up on the outside edge within the loop.
Step 06
Tighten the slack while holding the needle in the fabric, then pull the needle through and bring the thread to the surface. Repeat these stitches until the shape is filled.
Step 07
The final stitch needs a holding stitch on the outside edge to secure the last loop.

History

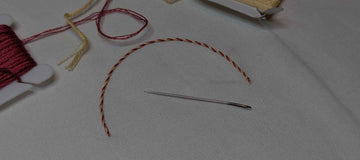
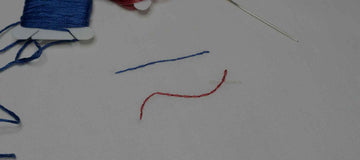
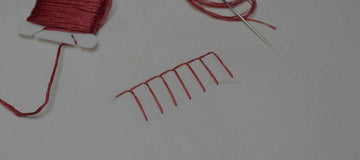
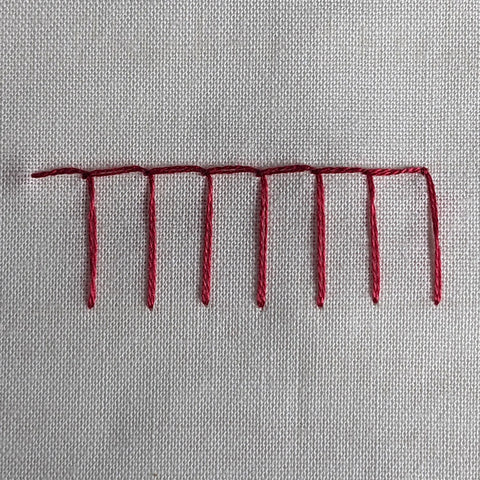
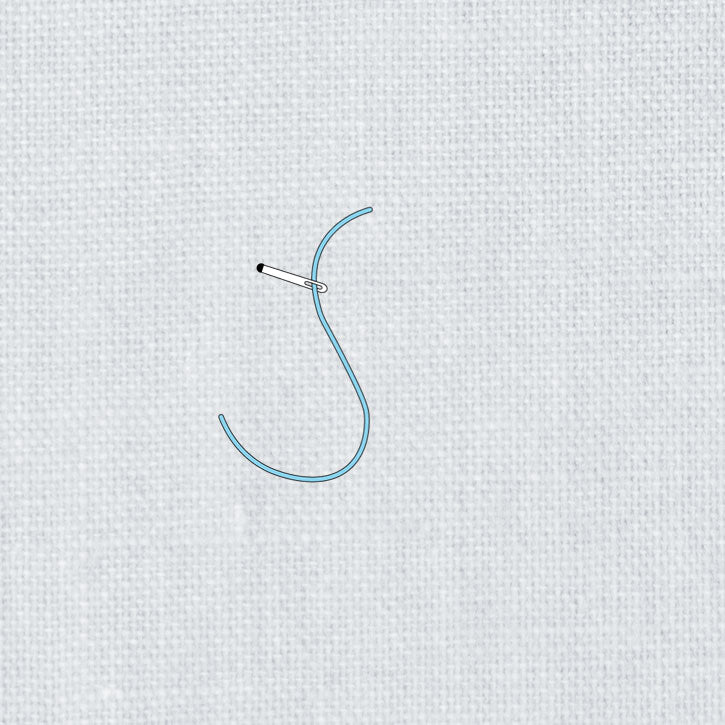
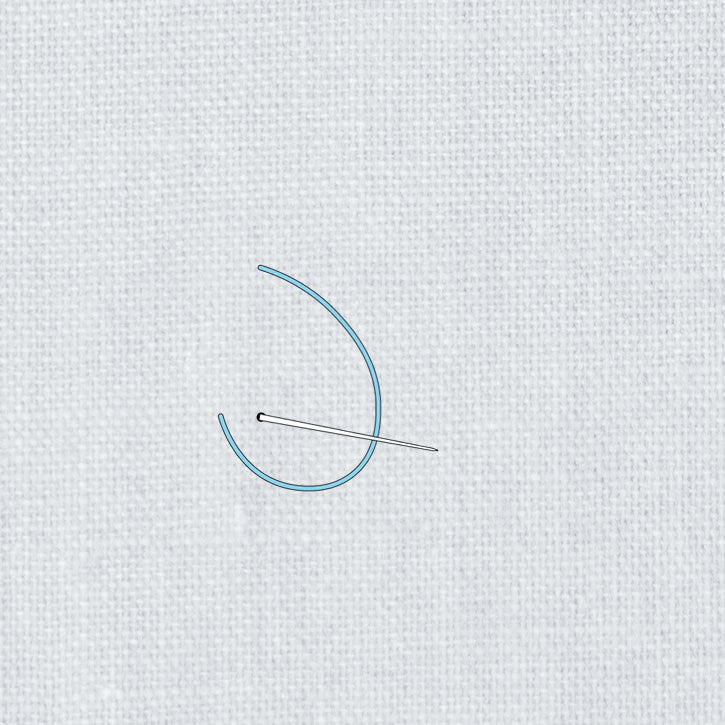
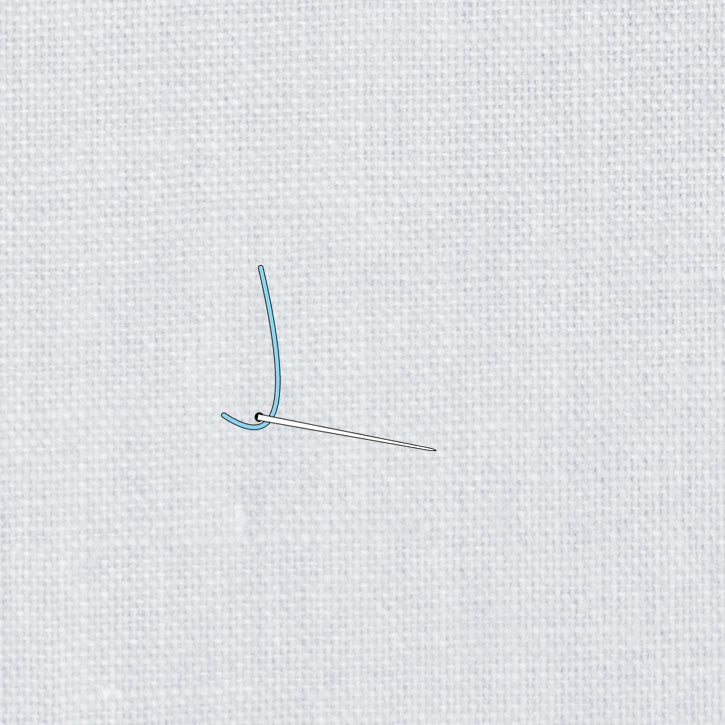
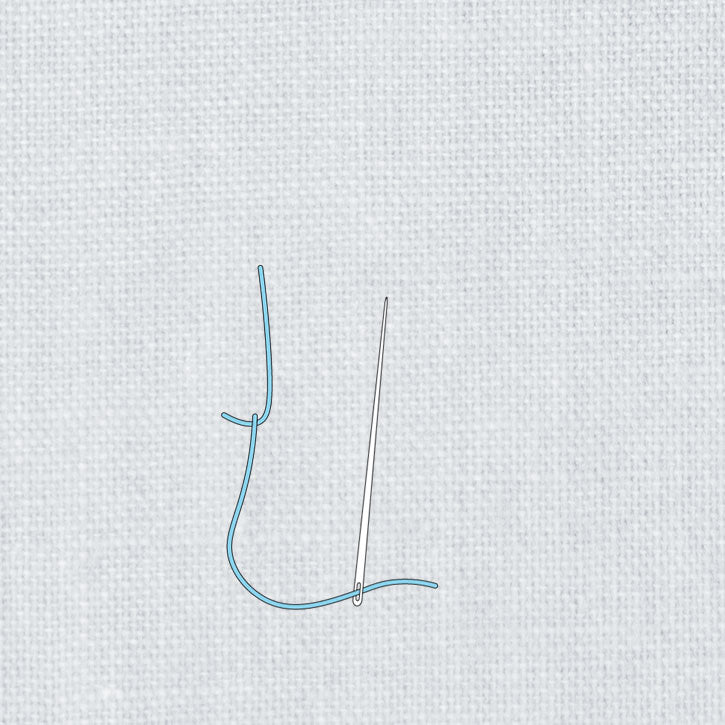
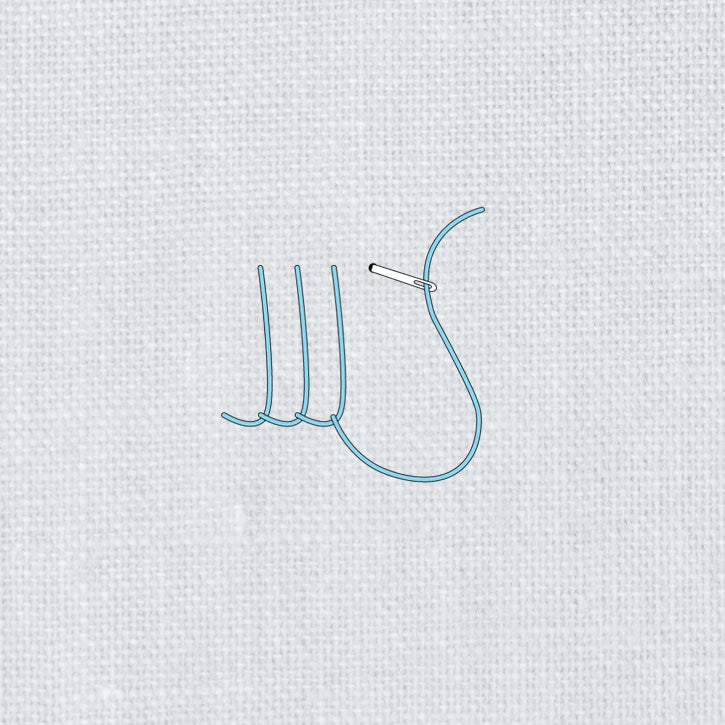
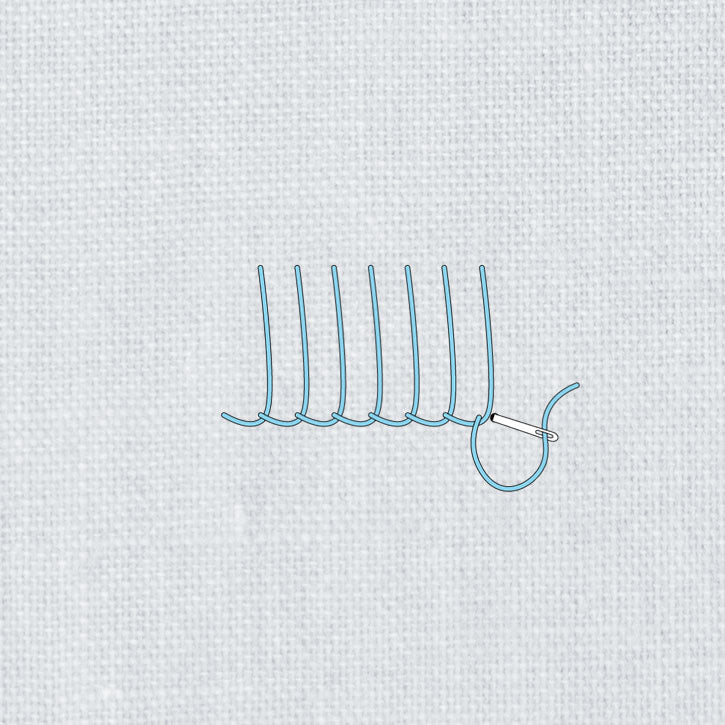
The Blanket Stitch comprises a series of loops, each secured by the subsequent stitch to create an L-shape. Its stitching technique closely resembles that of the buttonhole stitch, with the primary distinction lying in the spacing between stitches.

Earliest traces of the blanket stitch date back to the excavation of 4th century AD artifacts in Kellis, Egypt, where a child's tunic showcased multicolored blocks of blanket stitch adorning the hood's edge.

Throughout history, the blanket stitch has remained prevalent in various embroidery traditions. It features prominently in Guimarães embroidery from Portugal (dating back to the 10th century, although its use in this context may not extend as far), serves as a central stitch in Old Rabat embroidery from 17th century Morocco, adorns indigo-dyed garments in Jebel Haraz, Yemen, alongside other embellishment stitches, and is utilized by embroiderers from the Siwa Oasis, Egypt.


Projects

Here are some projects you can complete that include this stitch!

projects coming soon…


Reference: RSN Stitchbank

Previous
Backstitch // Hand Embroidery Stitches
Next
Lazy Daisy Stitch // Hand Embroidery Stitches

Leave a Comment

Your email address will not be published.

Hi, I'm Kate 👋

About the author

In a previous life (AKA: pre-kids), I was a web des/dev & photographer who loved to dabble in numerous arts and crafts. Now, I'm a cross-stitch & embroidery pattern designer and full-time mum to Charlie & Alex, with adult-diagnosed ADHD. Closet nerd, self-proclaimed hermit and professional procrastinator. I have a secret crush on modern architecture, brush calligraphy, sweets, pretty nails and pastel colours.

Sign up for the newsletter

Don't worry! You won't be inundated with emails and you can unsubscribe whenever you need to.