I want to cross-stitch but I don't know how!
In this tutorial, I'm going to show you how to understand how to "read" that cross-stitch pattern you've purchased and/or downloaded.
This guide is ideal for anyone who has gotten any of my cross-stitch patterns, as I'm using my own as a guide to learning. However, like most things, other people have their own way of doing stuff. I've seen cross-stitch patterns from other designers look very different from my own — and that's OK!
Basics of a pattern
There are a few things that are always on a cross-stitch pattern. They are:
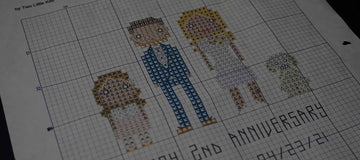
- The design displayed in some form of grid (usually a 10² grid)
- A list of required floss colours
- A legend of the colours
Patterns can sometimes also offer basic instructions on how to cross-stitch, what size fabric is recommended (aka; the Aida count), how big or small the finished design will be based on the recommended fabric count and even a photo of how the finished design will look.
Patterns are all made by different designers, so each designer will have their own way of doing things [obviously]! With this how-to, I'm going to talk about how to read one of my patterns specifically.
Just remember: getting a printed or digital pattern is not the same as buying a cross-stitch kit. Those will come with everything you need to complete your finished product, such as fabric, floss, needles, a hoop, etc. A pattern on its own implies you get your own tools and materials.

Pattern Design
When you look at the design of the pattern itself, it is going to be a series of squares with unique symbols printed in the middle. These symbols are super important - they are the quick and easy way of telling you exactly which colour to stitch with, based on the legend (see below).
Sometimes the squares will be coloured and sometimes you will get a black and white pattern, which each black-outlined square showing a black-coloured symbol inside. This is exactly the same as a colourful pattern, it's just a more printer-friendly pattern.
Depending on the pattern itself, you might also have a design that spans over several pages. Sometimes, if your design is rather large, it would be too difficult to see each square & symbol if it was only on a single page. So each page will be numbered and include an "overlap". This overlap is usually a few squares greyed out showing the edge of a previous page so you can easily align your work.

Design Legend
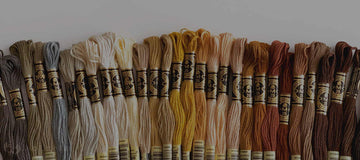
Somewhere in your pattern, there will be a list of all the symbols from the design laid out alongside a floss colour/name/number. For any patterns you get from me, this will show you the DMC colour number. Some patterns will also include backstitching and/or french knots, but that just depends on what the design looks like 😊
Some patterns will have only a small handful of colours but others might have dozens! It really depends on what the designer has chosen. A good rule of thumb though is to have as limited palette as possible, so a buyer doesn't need to go and buy hundreds of flosses before they can start a project.
The legend might be a page of its own, or it could be alongside a photograph of the finished design. Again, it depends on the designer and what they've chosen.
Wherever the legend is, it is always a good idea to print -if you're printing a physical copy of the pattern- the legend along with your design, so you don't get confused or lost while stitching.

That's it! Now go forth and get creating! You now know all the bits needed to be able to go and understand almost any cross-stitch pattern. At least any of the patterns available for download from my shop.
I can't wait to see what you create next.


