Tweeding: Breathing Life into Stitch People Portraits
In the realm of cross-stitch and embroidery, colour is more than just a visual element—it's a storyteller. Tweeding, the art of blending different floss strands, allows us to craft new hues and textures, adding depth and realism to our creations.
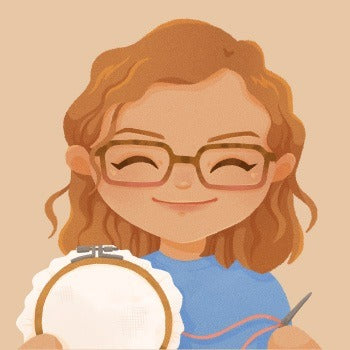
In my stitch people portraits, tweeding has become an indispensable tool, especially when portraying the intricate details of hair, the softness of fur, or the ruggedness of denim.
What is Tweeding?
Tweeding involves combining two or more strands of different coloured embroidery floss and stitching with them as a single thread.
This technique creates a subtle intermingling of colours, resulting in a unique, blended effect that can mimic natural variations found in real life. It's akin to the speckled appearance of tweed fabric, hence the name.
Why Use Tweeding in Portraits?
There is a number of reasons to use tweeding for [not only] stitch people portraits, but in a variety of projects! Here are some common uses I frequently combine thread colours though, specifically for my custom, handmade portraits:
-
Hair: Human hair isn't a single flat colour; it has highlights, lowlights, and varying tones. Tweeding allows me to replicate this complexity, capturing everything from sun-kissed strands to the depth of brunette locks.
-
Fur: Animals often have multi-tonal fur. By blending strands, I can depict the natural gradations and textures, bringing a lifelike quality to each portrait.
-
Denim: The worn, textured look of denim, with its subtle colour shifts and faded areas, is beautifully rendered through tweeding, adding authenticity to clothing details.
Swatch Examples


How to Prepare Tweeded Floss
Here's a step-by-step guide based on my personal method:
-
Select Your Main colour: Identify the primary colour you wish to represent.
-
Choose Complementary Shades: Pick one shade lighter and one shade darker than your main colour. If you're aiming to depict highlights or streaks (like in blonde hair), consider selecting a highlight colour instead of a darker shade.
-
Document Your Choices: Note the three selected colours on a paper bobbin or in your project journal for easy reference.
-
Cut Equal Lengths: From each of the three colours, cut an arm's length of floss, ensuring all strands are of equal length.
-
Combine Strands: Take one strand from each colour, aligning them together.
-
Thread and Stitch: Thread the combined strands into your needle and stitch as you normally would.
-
Admire the Blend: As you stitch, observe how the colours intertwine, creating a rich, nuanced effect.


Tips for Effective Tweeding
-
Keep Records
Document your successful blends for future reference, especially if you plan to recreate or expand upon a design.
As you might've noticed in the above imagery, I personally write the floss numbers directly on my bobbin. That way I can always easily make more if I need to!
-
Consistency is Key
Maintain the same strand combinations throughout a specific area to ensure a uniform appearance.
-
Experiment
Don't hesitate to try unconventional colour blends. Sometimes, unexpected combinations yield the most striking results.
Conclusion
So that’s my secret weapon for bringing stitch people portraits to life!
If you haven’t tried tweeding yet, I really recommend giving it a go—start with a small detail like hair or clothing and see how it adds depth. Already a floss-blending fan? I’d love to hear about your experience in the comments below!
And if it feels a bit fiddly at first, don’t worry—tweeding can be tricky, but with a bit of practice, it becomes second nature. Just have fun experimenting!
Further Reading
For a more in-depth exploration of blended threads and their applications, I highly recommend Sirithre's article, "Blended Threads: Creating New Floss colors With Tweeding." It's a treasure trove of information and inspiration for both novice and experienced stitchers.