Bad Cross-Stitching Habits to Break
If you've ever picked up a cross-stitch project and felt frustrated by uneven stitches, messy threads, or a final piece that doesn't look quite right, you're not alone. Even experienced stitchers can fall into bad habits that make things harder than they need to be. I've made plenty of these mistakes myself, and today, I'm here to share what I've learned so you can avoid them too.
Here are 12 common cross-stitching habits to break -plus a few bonus tips- to keep your stitching smooth and stress-free. Let's dive in!
12 Habits to Break for Better Cross-Stitching
-
Ignoring Needle Size
Using the wrong needle size can make your stitching a nightmare. A needle that's too large might distort your fabric, while one that's too small can be tough to thread (when using so many strands) and even harder to work with. Stick to the recommended needle size for your fabric and thread—it'll save you a lot of frustration.
-
Overlooking Thread Quality
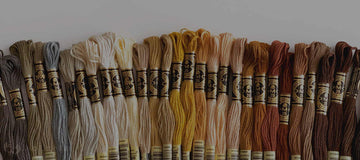
Cheaper threads might seem like a good deal, but they can fray, tangle, may not be colour-fast and/or lose their colour over time. Investing in high-quality thread from reputable brands ensures vibrant and durable results. Trust me; it's worth it.
I personally use & recommend DMC brand floss for all of my patterns.

-
Not Securing Your Start Appropriately / Avoiding Knots
Starting your floss with a knot might feel quick and easy, but it can lead to lumps in your work and make framing a challenge. Instead, use techniques like weaving the thread under existing stitches or using a waste knot to secure your start smoothly.
-
Inconsistent Stitch Direction
Uniformity is key in cross-stitch. Make sure all your top stitches lie in the same direction. This simple habit can make a huge difference in how polished and professional your work looks.

-
Incorrect Strand Count
Using too many or too few strands of floss can throw off the look and texture of your design. Check your pattern's recommendation and adjust as needed to suit your fabric.
Part of this does come down to personal preference, though. If you like big, puffy stitches - go for it! If you like to see the distinct X's with fewer strands, all power to you!
-
Cutting Too Little Fabric
Always leave at least a two-inch margin around your design. Sometimes even a three-inch border for larger patterns is best. Cutting your fabric too small can make framing and finishing a nightmare—not to mention the risk of running out of space for your design.

-
Carrying Your Floss Across Long Distances
It's tempting to carry your thread across the back of your work for convenience, but long strands can show through lighter fabrics or create tension issues. Take the time to start and end your threads properly instead. It can feel like a nuisance, but it will save you from potential grief in the long run.
-
Poking the Needle in the Wrong Part of the Fabric
Cross-stitch fabric is designed with evenly spaced holes for a reason. Accidentally poking your needle in the wrong spot can lead to uneven stitches or holes in your design. Always double-check your placement before pulling the thread through. And if you notice it's incorrect after pulling the thread through, just simply remove the needle from your thread and pull out the offending stitch.

-
Leaving a Needle Parked in Your Work / Not Using a Needleminder
Leaving a needle stuck in your fabric for too long can cause rust spots (depending on the needle & where you live) or stretch the fabric. Using a needleminder to keep your needle safe and avoid dropping it (which is a hazard for bare feet or even butts, too!) is ideal; but also a fun way to personalise your project!
-
Stitching with Unclean Hands
Even slightly dirty hands can transfer oils or stains to your fabric. Wash your hands before stitching, and avoid snacking while you work to keep your project pristine. It's hard; I know. Trust me..!

-
Using Embroidery Scissors for Everyday Things
Embroidery scissors are a precision tool. Using them for other tasks can dull the blades, making it harder to get a clean cut on your floss. Keep a separate pair of scissors for non-stitching needs.
-
"The Back Should Look Pretty"
There's a myth that the back of your work should look as neat as the front. While it's good to avoid unnecessary knots and tangles, the back doesn't have to be perfect—it just needs to be functional. Don't stress too much about it!
I personally enjoy having a neat back to my work and pride myself in its look. But I am in the minority.

Bonus Tips for Better Stitching
-
Rushing the Process
Cross-stitch is meant to be a relaxing, meditative craft. Take your time and enjoy the journey—you’ll be amazed at how much better your work turns out when you’re not rushing.
-
Double-Stitching Two Squares
Sometimes, stitchers accidentally stitch over the same square twice. While this can add an interesting texture, it’s usually unintentional and can throw off your design. Pay close attention to your work to avoid this mistake.

-
Not Embracing the Learning Curve
Everyone makes mistakes when they’re learning! Whether it’s uneven tension or a miscounted stitch, see it as part of the process. Each project will teach you something new and help you grow as a stitcher.
Wrapping Up
Breaking bad stitching habits can make a world of difference in the quality of your work and how much you enjoy the process. I hope these tips help you feel more confident in your cross-stitching adventures! For more helpful tutorials, check out my posts on Cross-Stitch 101: Making The Stitches and Understanding Cross-Stitch Symbols.
Happy stitching!


