Let's keep learning cross-stitch!
It's been a little while! Let's have a continuation on my basic cross-stitching lessons, finally! Today I'm going to talk to you about the various different stitches you are likely to come across when reading a cross stitch pattern. Especially any of my own patterns that are deemed intermediate or advanced.
Table Of Contents For Lesson 3
What do those symbols and shapes mean?
This lesson is going to talk about the shapes and symbols you see on a cross-stitch pattern you've now ready to create!


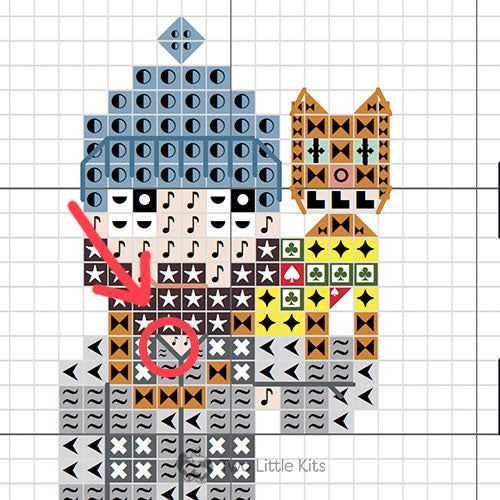
When you purchase a pattern, it's likely you will get a black and white pattern with a bunch of little symbols in each square. You might also receive coloured patterns -like the one you see here and will get with any pattern purchased from my website- with symbols on them too. These symbols correspond to a legend, or key, of which flosses are recommended for the pattern itself.
But sometimes, you might find a pattern that isn't just filled with a bunch of evenly spaced little squares (which indicate a regular full cross-stitch). What do you do now? What do they even mean? How do you actually stitch these strange shapes?
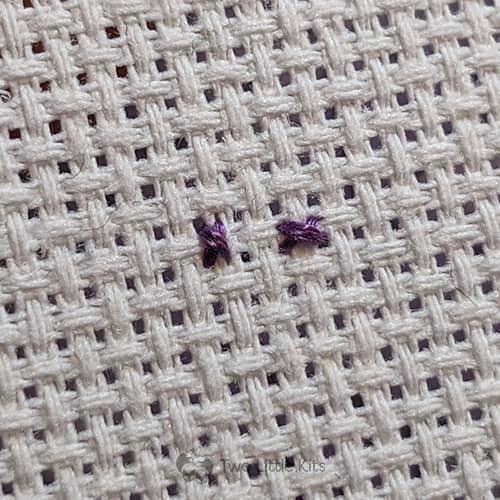
What does this half-square mean?
This is what's called a half cross-stitch. It's where you are only utilising half of a cross-stitch square -either horizontally or vertically, depending on the pattern- and creating one teeny tiny little rectangular cross-stitch. See the images below for a step-by-step of how I recommend stitching a half cross-stitch.


Wait, now there's a triangle?
This is known as a ¾ stitch! It hits 3 of the 4 corners of the Aida cloth to form a mini triangle and is great for rounding out sections of patterns. And trust me; once you've done it a few times, it's no big deal!
Similar to the ½ stitch, we're going to pierce the cloth between it's natural holes but this time, it will be the very center of the square.


What about 2 coloured triangles?
This is a ¼ and a ¾ together to form one full cross-stitch.
There's a few different ways to stitch this but I find the shown example to look the nicest and cleanest way. It does mess up the "flow" of your crosses (see lesson 2 for an explanation of why we want the top stitch to sit in the same direction) but I feel like some patterns require it.

You'll find a lot of my own personal patterns include these kinds of stitches - I feel like they can add a huge difference to a piece!
One drawback of this stitch is that it interrupts the natural flow of the top stitch, so you will find that your top line might not face the same direction ( /// or \\\ depending on which way you cross-stitch normally).
Wrap up
Congratulations! You're continuing your journey into this peaceful, calming, creative hobby by being able to pick up any pattern and feeling confident that not only do you understand what you're "reading", but you can actually do those stitches! They might seem daunting but I promise you; once you've practised them a few times, keep your tension even and clear your thread of any twists or knots, you'll be a pro in no time.