So today, I would love to show you one way I finish my embroidery pieces.
I'm not fond of the idea of using glue, tape or anything like that since I don't know how it could affect the fabric (or worse, the thread of the piece!) in the future. So to finish my pieces - when they are in an embroidery hoop- I simply use thread to hold it all together.
First of all, this is not a temporary finish. Once you've made cuts and tied knots, it will be really difficult to re-finish your piece. So make sure you're 100% done stitching before getting started on this.


- All you need is your finished piece, a needle (rounded or pointed, either way) and a long cut of thread.
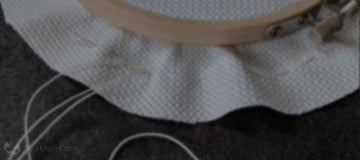
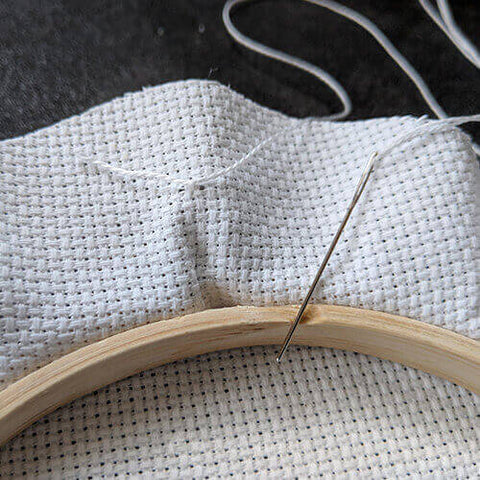
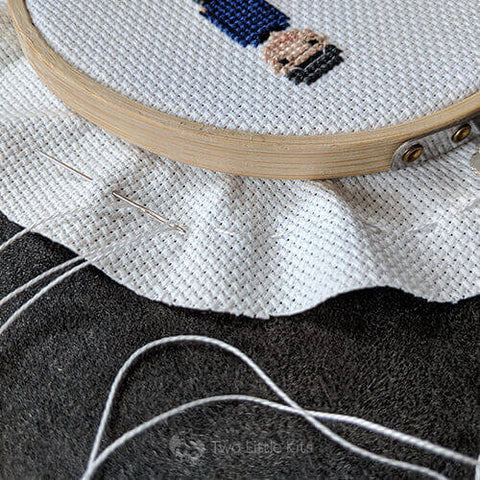
- First; we will be tying a strong knot. I do a double knot and go through two squares that are next to each other.
- Thread the needle up and down through the fabric, roughly in 1cm spaces, all the way around the circle.
- You should come all the way around to the original knot and still have a decent amount of thread left - you need something to hang onto!
- From there; pull! (see video!)

Once you have secured the cinch of the aida fabric, you will be sewing on a backing of your choice to the piece. Personally; I like using felt as it has a rigidity to it and a nice thickness so you cannot see through to the "inside" of the piece.
After you have a cut of your fabric/felt/whatnot to the same size as the inside of the embroidery hoop, you will take some more thread and secure it to the aida cloth like before. You want to make sure the thread you cut at least three times as long as the circumference of the hoop, more if you are willing. We are going to do a blanket stitch around the fabric and it requires a lot more thread than the cinch does.
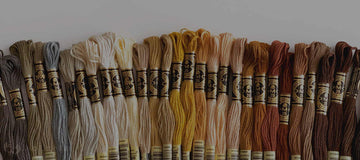
I personally use a colour similar to the felt backing (see figure 05. for the colouring I currently use) mostly because I like the colours and it matches both the Two Little Kits' branding and the embroidery hoops I use.
Once you've gone around the whole hoop (roughly 1cm spacing looks nicest and make sure the inward stitches are both as long enough to snag the aida and go past the inside wooden hoop) tie off the thread so it hides inside the felt. This is tricky but not impossible!
And that's it! Congratulations - not too hard, right? I highly recommend considering going glue-less, especially if you're doing commissioned pieces.