Sticky, Not Tricky: Mounting Your Cross-Stitch on Board for Framing
There's nothing quite like the feeling of that last, final stitch in your project. That little moment of celebration when you step back, look at your finished cross-stitch piece, and whisper, "I did that." But if you're anything like me, the excitement of finishing the stitching is sometimes followed by a very specific kind of dread: How on earth am I going to actually finish-finish this?!
If you can relate to this, just know — you're not alone.
Mounting your work for framing can sound intimidating, especially the first few times. But here's the good news: cross-stitch and rectangles are basically besties, and that makes framing a fantastic way to turn your stitching into a beautiful, display-ready piece.
Today I'll show you a cost-effective and beginner-friendly way to mount your cross-stitch using a sticky board. Let's get that project off your WIP pile and into a frame where it belongs!
What You'll Need:
- Your finished cross-stitch piece (washed and pressed)
- Sticky mount board
- Rotary cutter or sharp scissors
- Ruler or any flat tool
- Fabric glue (I like Fabric Fusion)
- Heat- or air-erasable marker (optional)
- Clips to hold fabric edges down while drying (optional)
- A clean, clear surface to work on

-
Start fresh and clean.
Before you dive into finishing, take a moment to celebrate your completed piece — woohoo!
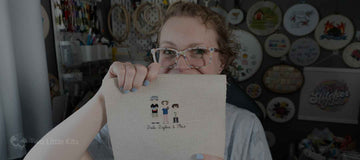
Then, give it a gentle, hand-wash and a good press if you have an iron. This helps remove any oils or marks from handling and leaves your stitches looking crisp and fresh.

A clean, pressed stitch people wedding portrait. -
Mark your placement.
Flip your stitched piece upside down on your clean surface. Lay your sticky board on top and shift it around until it's perfectly centred. (Spoiler alert: this part is harder than it sounds — I've done this heaps of times and I still get it off sometimes!) Once it's in the right spot, use your marker to trace the edges of the board onto the back of your fabric.

Marking the edges with removable ink. -
Stick it down.
Peel off the paper backing from the sticky side of the board. Carefully line it up with your markings, then press it gently into place. Take your time — this part is where accuracy matters most.
Don't forget to readjust the piece to the board if it visually looks misaligned before you press down harder. Now's the time to get it perfect.

Press gently! -
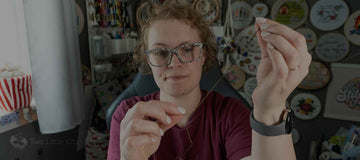
Secure your stitches.
Flip the piece over so the stitching is now on top. Using something with a rounded, clean tip — like a capped pen or your finger wrapped in a soft cloth — press the fabric down all over the board, especially around the stitched areas, so it sticks evenly and snugly.

The tip of this pen lid is rounded — perfect for this! -
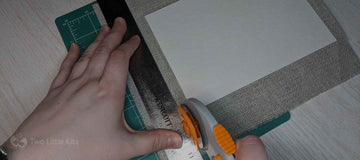
Trim the excess.
Flip the piece back over and measure how much fabric you want to keep around the edges. I recommend leaving at least half an inch. Use a rotary cutter (or scissors if that's what you've got) to trim away the extra fabric on all four sides.

Don't forget to cut on a mat. -
Snip the corners.
Next, cut off the corners of the fabric — but don't cut right up to the edge of the board! Leave a little gap between your cut and the board corner. If you cut too close, you'll end up with a frayed, messy finish. And nobody wants that.
You should now have four little fabric "flaps" poking out from each corner. This is exactly what we want for the next step!

Using the mat's grid to cut right angles. 
Ready for the next steps! -
Glue the flaps down.
Run a small line of glue along one fabric flap at a time. Use a ruler or another flat-edged tool to press the flap neatly down onto the back of the board. You can even clip them in place while they dry if you like — just make sure not to squish the stitching.
My ruler is permanently decorated with dried glue from doing this so often! 😆

1. Glue, 
2. Press, and 
3. Done! -
Let it dry and decorate the back.
Once the glue is dry and the flaps are secure, you can decorate the back however you'd like — felt, paper, labels, you name it. For commissions, I stick a "Two Little Kits" sticker on it and for my test stitches, I simply write the date of completion. But you do you!
And that's it — your piece is mounted and ready to pop into a frame!

Each piece gets a "Two Little Kits" sticker.
See It In Action
Here are a few finished pieces I've mounted this exact way — scroll down to see how they turned out!


Want Another Option?
If you're not in a framing mood or want something a little more handmade in its look, you might like to try finishing your cross-stitch in an embroidery hoop instead! I've got a handy tutorial here:
- How To: Finish a Cross-stitch in an Embroidery Hoop
- How To: Finish a Cross-Stitch in an Embroidery Hoop – Version 2 (This is how I currently finish pieces.)

Over to You!
Have you tried mounting your cross-stitch on sticky board before? Do you have a favourite way to finish your pieces? I'd love to hear about it! Share your thoughts in the comments, or tag me if you post your own finish — I love seeing what everyone's been working on!
Happy stitching (and finishing!)
🧡 Kate